Fancy Jug Cover
Free Crochet Pattern
 |
It's funny how in one month you can go from loving the rain to loving the sun. Or have I just been lying to myself this whole time??
I'm spending summer 2025 between Switzerland and Spain, with a bit of Italy thrown in for good measure. This is new. 30'C is the average daily temperature, and between the healthy salads and litres of water, the jogging, cycling and swimming (not to mention housework in the heat which I'm sure constitutes as hot yoga), I'm not sure I still recognize myself.

Here in Switzerland they make a huge jug of herbal tea every morning. The fruit flies love it. It generally sits out, uncovered, gaining a film of drowning beasts.
Unable to bear it any longer, this week I had to find a solution.
And voila! Here is my answer to a new life of (strangely comforting) luke warm tea in a jug.
I hope you like it (Free Pattern below)!

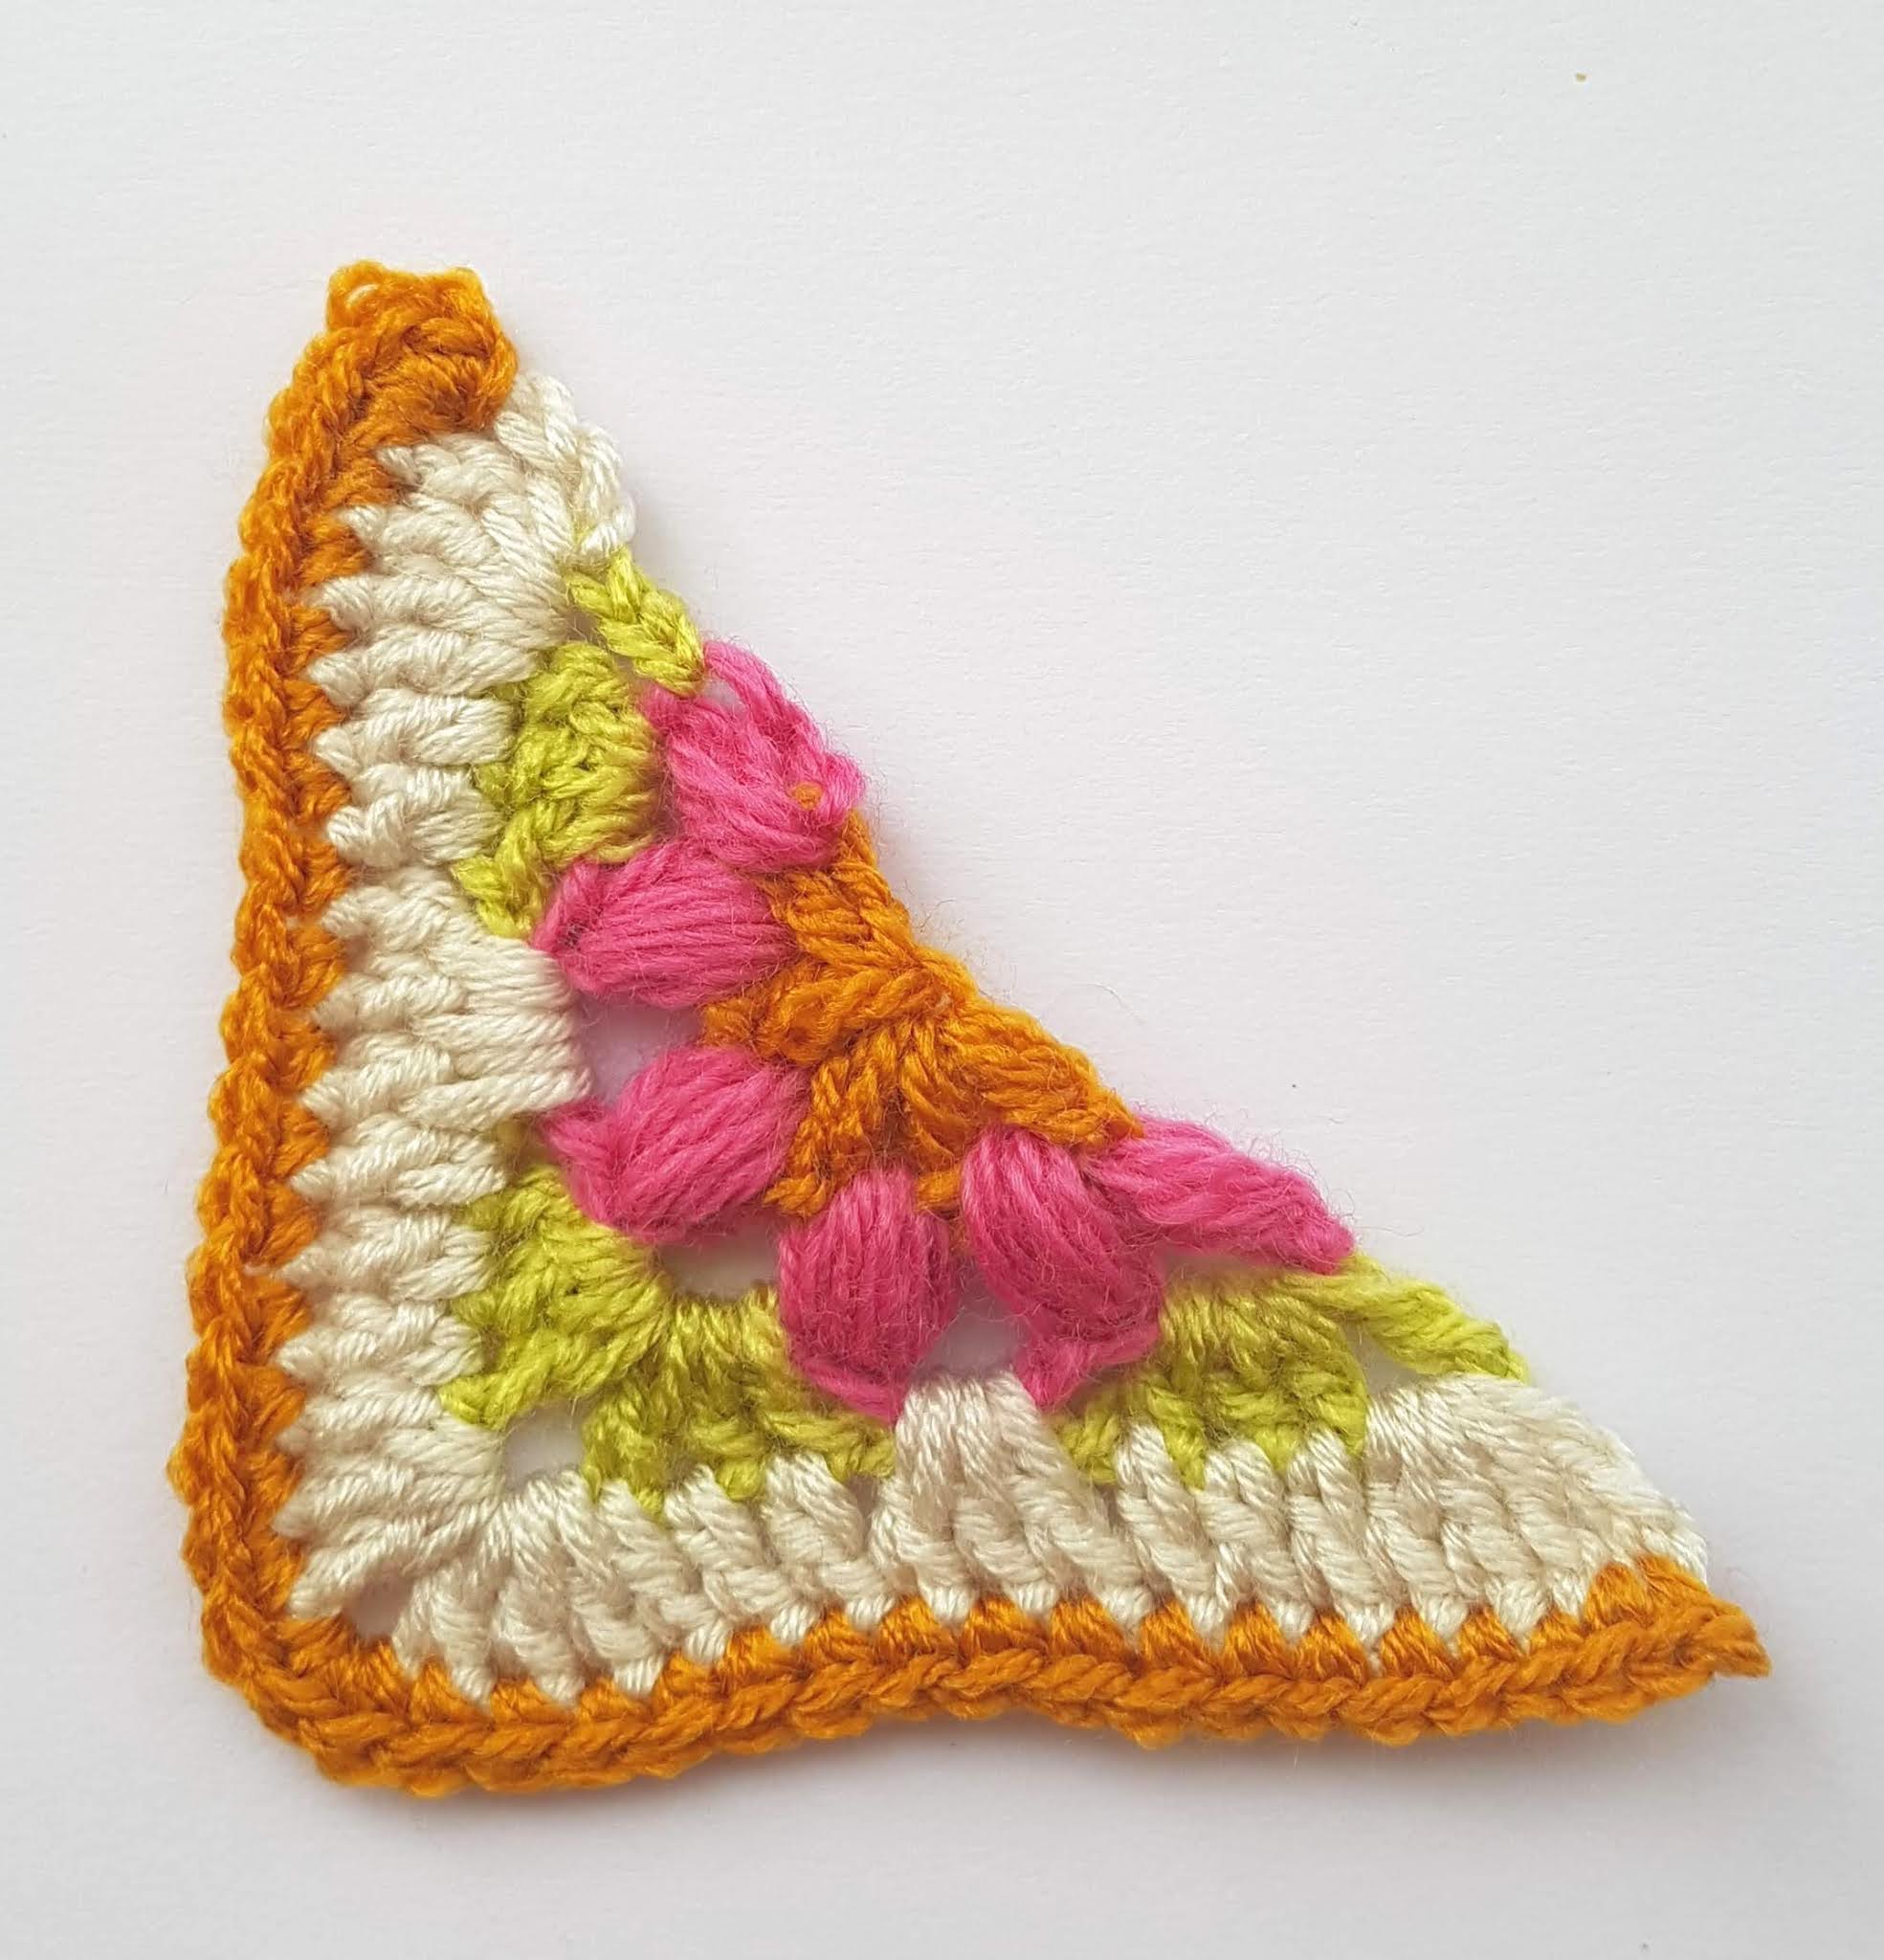
Fancy Jug Cover - free crochet pattern
Materials:
• Small amount of 4ply crochet cotton – approx 15g (pictured here in Lino 100% by Katia Col 8 – each ball 50g/150m/164yds)
• 3mm crochet hook
Special Stitches:
• tr (treble crochet) = yarn over, insert hook and draw up a loop, yarn over and draw through the first two loops on the hook, yarn over and draw through last two loops
• dc (double crochet) = insert hook and draw up a loop, yarn over and draw through both loops
• Flower:
ch11 (= stem of Flower),
1dc into 4th chain from the hook,
ch4, 1dc into the same ch,
ch5, 1dc into the same ch,
ch4, 1dc into the same ch,
ch3, 1dc into the same ch (= 5 petals made),
slip st down along each remaining chain of the stem
Notes to this pattern:
1. Pattern is written in UK terms
2. Pattern is worked in the round

BEGIN PATTERN:
Ch4, join with a slip st to form a ring
Round 1: Ch2 (does NOT count as st here and throughout), 12tr into the ring, join with a slip st to top of 1st tr [12tr made]
Round 2: Ch2, 2tr into each st around, join with a slip st to top of 1st tr [24tr made]
Round 3: Ch2, 2tr into very first st, *ch2, skip next st, 2tr in next st; rep from *, ending with ch2, join with slip st to first tr [12 pairs of tr, 12 spaces made]
Round 4: Ch2, 2tr in very first st, 1tr in next st, 2tr in ch2-space, *2tr in next st, 1tr in next st, 2tr in ch2-space; rep from* around, join with slip st to first tr [60tr made]
Round 5: Ch2, 2tr in very first st, 1tr in each of the next 2sts, *ch2, skip 1, 2tr in next st, 1tr in each next 2sts; rep from* around, ending with ch2, join with slip st to top of first tr [15 sets of 4tr, 15 spaces made]
Round 6: Ch2, 2tr in very first stitch, 1tr in each of the next 3sts, 2tr in ch2-space, *2tr in next st, 1tr in each of the next 3sts, 2tr in ch2-space; rep from* around, join with a slip st to top of 1st tr [105tr made]
Turn your work to face the wrong side for the last two rounds as follows:
Round 7 (Wrong Side): Work 1dc between the first two trebles, *ch6, skip 4sts, work 1dc between the next 2sts; rep from * around, ending with ch6, skip last 5sts, join with slip st to first dc [26 loops made]
Round 8 (Wrong Side): (4dc, Flower, 4dc) all into first loop (see Special Stitches for Flower), *(4dc, Flower, 4dc) all into next loop; rep from * around, join with slip st to first dc
Fasten off and sew in ends on wrong side.

I hope you enjoy this free crochet pattern. There are many more free crochet patterns on this Blog, and you can download 130+ easy to read crochet patterns directly from my Nancy Said Etsy Shop. I keep prices low so you can shop guilt-free!
Stay connected with me:
Thank you for your company - Nina x

For 130+ crochet patterns visit Nancy Said Etsy Shop